Recently, I've been using Powerpoint 2010 to create screencasts to deliver lessons to my A Level students while I recover from a knee operation. It's possible to create high fidelity video files (wmv.) of your presentations very easily by using 'Save and Send' under the 'File' tab in PowerPoint. Alternatively, you could use the 'Community Clips' tab on the banner to record at a lower resolution. I've uploaded my presentations to YouTube so that my students can access them anywhere and I can embed them in my teaching blog. I'll continue to use this method of delivery when I return to work as a way of flipping some of my lessons.
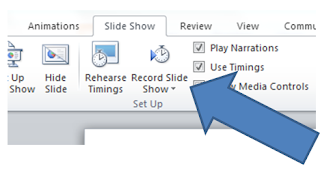
Before creating a video, you need to record your slideshow. In order to do this, simply press 'Record Slide Show' under the 'Slide Show' tab. It's possible to press the 'esc' key at any time during the recording and the animations and narration will be recorded up to that point. The narration is recorded as a sound file on each slide. This is an advantage as you don't have to re-record everything from the beginning if you fluff your lines (Tip: don't talk between slides as your voice isn't recorded during transitions).
I bought a cheap headset and microphone from a local supermarket (like this one) to record my narration, though it's possible to record your voice with a built in microphone, if your device has one. Remember to keep your presentations shorter than 15 minutes if you wish to upload them to YouTube. Also, the longer the presentation, the longer it will take to convert to a wmv. file (this can take a while!).
I had some fun using animations to enliven my presentations and tried to keep the text to a minimum. In my next post I'll explain how I formatted and animated the objects in this Welsh medium presentation.
The cartoon was taken from this website

